
Compensation Statements may be the most critical aspect to a successful Compensation implementation. Statements are typically the only visibility employees have to the Compensation module and are important in not only communicating final payments to employees but also in letting them know of any other company directives and overall business results.
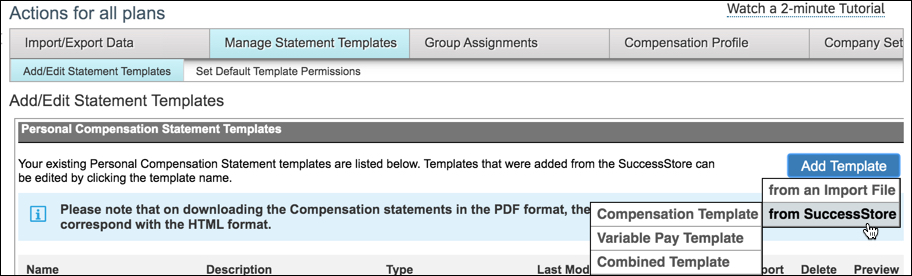
Working in Compensation for over 15 years, I have configured a lot of compensation statements. Sure, custom statements in XSL can be created to meet all of the customer’s wildest dreams, but this may not always be needed or possible as customers might be restrained by budget, time, or expertise in maintaining year over year. Standard delivered statements can be used for compensation, templates, variable pay templates, or a combination.
My Top 10 List on how to optimize standard compensation statements:
1. Gather statement requirements early
Statements are often thought of as an end of the process final product. While they are just that, you will find that if you include statements as part of the early requirements discussion along with the design of the compensation plans, you will end up with a better final product.
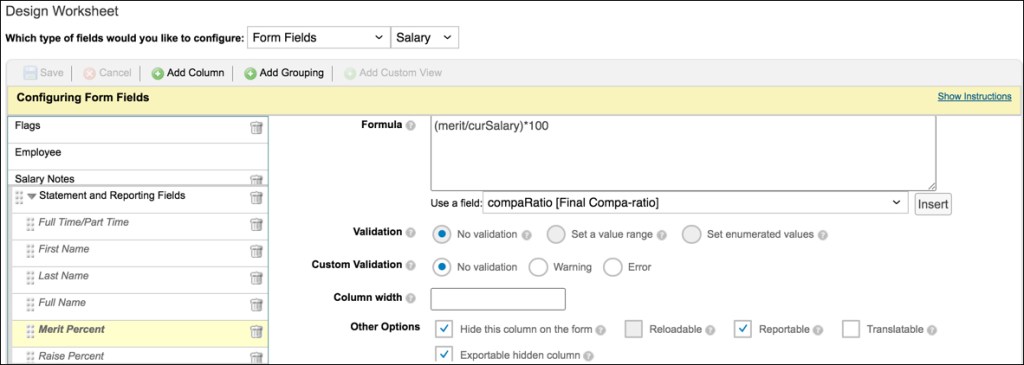
In order to pull fields of information into the statements, they must be a field in the plan template(s) you are referencing. You can include extra indicative data or calculated fields (such as Merit Percent) or fields that show final values rounded (such as New Annual Salary) in case your customer wants to show nice rounded numbers to the employees. These fields do not need to be made visible during planning, but can be hidden so they are available for display in the statement.
2. Take advantage of statement suppression
In 2019, SuccessFactors enhanced the compensation module to allow for statement suppression. Gone are the days of having to generate and recall statements for employees that you wouldn’t need to communicate awards to.
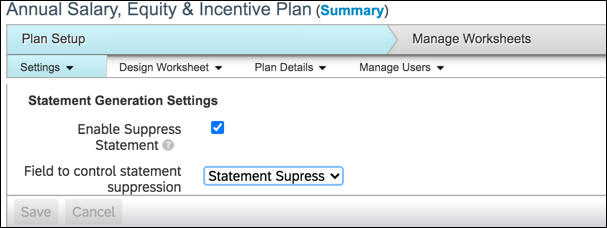
To start, create a custom column in your template to control the suppression based on the customer’s desired logic. For example, to suppress a statement because of a low rating the custom column could include the formula if(pmRating<2, “FALSE”, “TRUE”). Employees with the value “TRUE” will have statements generated, those with a value of “FALSE” will be suppressed.
Enable the setting from Plan Setup –> Settings. Select the box for Enable Statement Suppression and use the drop down to select the custom column you have created with your statement suppression logic. When statements are generated, the job status report will list the names whose statements have been suppressed.
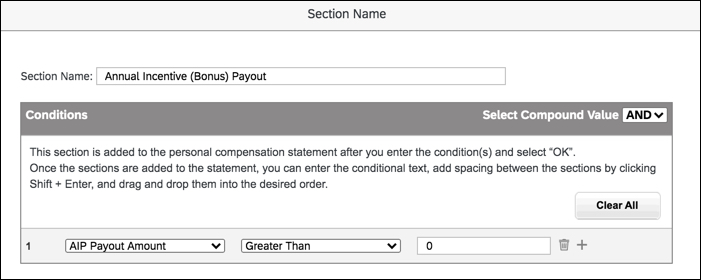
3. Make use of sections and conditional formatting for the right side data fields
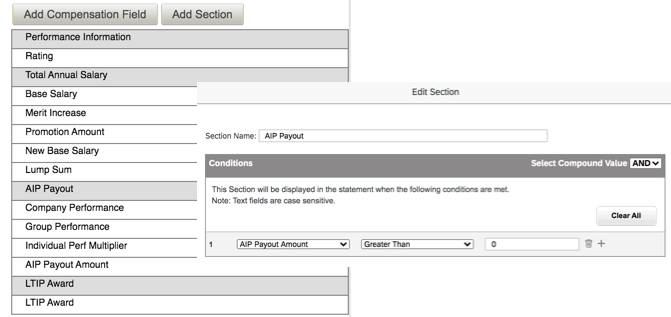
Group fields of data under Sections to consolidate Performance, Merit, Bonus, and Equity fields depending on the templates used in the statement. Conditional formatting can be added to suppress these groups for instance if the customer wishes to suppress the merit section if the employee had zero for their merit award. Conditional formatting can also be done on the field level in cases where customers wish to show the merit section for example to show salary information but not show the merit award field if amount = 0. This also allows for fields such as promotion or lump sum to only show if applicable to the employee.
4. Get the most out of the left side text and logo
Most of the time, the company logo being used throughout the SuccessFactors tool can be used as the logo in the statement as well. If the customer wants a custom logo, plan for this early as it can take time to the custom logo URL setup and to make sure the look and feel is right. Encourage the customer to use their standard logo if possible for a standard compensation statement.
Make use of font sizes and typographical emphasis to draw attention to key elements. Typically I use the small size font throughout for text sections. These text sections can be dragged and dropped depending on the order they should appear.
Conditional formatting can be added here as well to suppress the text section for instance if the customer wishes to only show the section if the amount is greater than 0. The conditional formatting on the left and right side should be configured together so that the logic aligns.
Typically customers can use the left side text to add in text that is applicable to all employees such as overall company results and any disclaimers that are needed around payment dates and rounding rules.
5. Keep the statement to 1 page if possible
Keep in mind the more text and fields you add, the longer the statement becomes. Most customers like to see a concise one page statement.
The Signature section is not really needed as you can add this to a text box above if the signature is pretty straightforward. The section itself even with no text configured in it can cause the statement to push to the next page as it shows below the text and data sections, even if it just shows a blank second page. This section cannot be removed, but you can trick the system into shortening it significantly if you simply add a few spaces.

6. Multi-language requirements aren’t necessarily a show stopper
Standard statements do not typically support multi-language requirements. You can however do a workaround and create translated standard statements using the English version as a baseline for the fields and input the required language into the text boxes and field names. If you have a requirement to translate the plan templates, you have a good start to the translations already for the fields. This process can be tedious, so make sure to have a pretty finalized English version before you start creating additional versions in other languages.
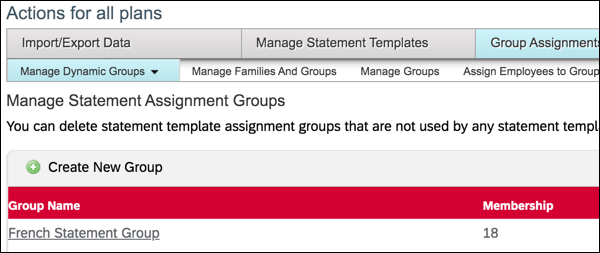
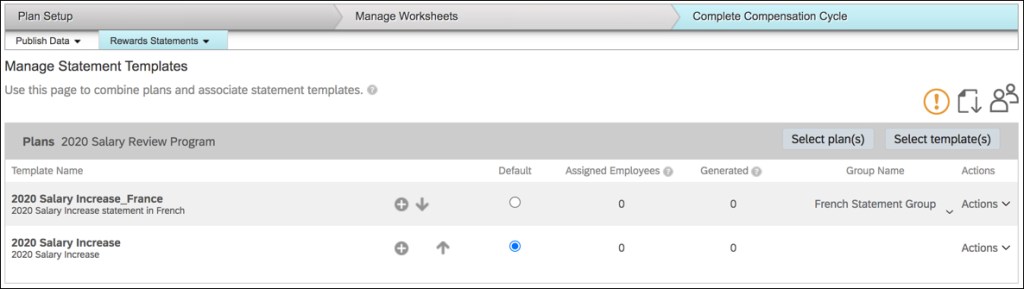
You can then configure statement groups to tie the translated statements to the groups of employees that need the statement in non-English languages.
7. Figure out the roles that will be involved in communicating statements
Planners are typically responsible for communicating the awards to their employees. They can download statements in several ways from their Completed worksheets or within the People Profile if permissions have been set. Additionally, check with your customer if they wish for the employees themselves to have access to their own statements. If this is the case, typically this is a task scheduled out a few weeks from the initial conversations with managers to open access to employees.
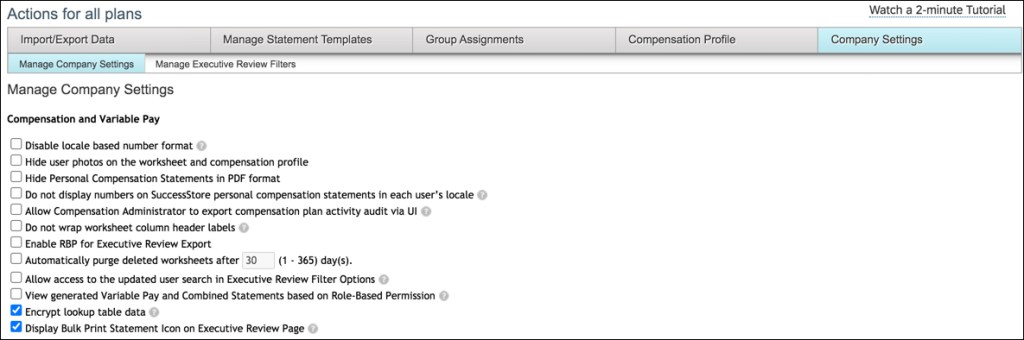
SuccessFactors recently added the ability to download statements directly from Executive Review. This allows higher level managers as well as HR managers (assuming role based permissions have been granted to allow access to Executive Review) to be able to download their span of control using the Bulk Print Statements button. The icon for bulk download now only appears if the employees have a generated statements based on the filters in Executive Review. In the previous version, the icon was displayed even if statements weren’t generated from recently filtered list.
8. Test early and often
In addition to gathering statement requirements early, plan to test the statements early as well. Ideally the statement would be part of the early iteration reviews to gather feedback before the frenzy of planning occurs. Create examples of statements to show all the different variations that are possible with the customer such as merit only, merit and lump sum, lump sum only, etc. If you wait until the planning is occurring in Production, you are no longer able to add or edit fields that customers may request in the statement.
Also test the role based permissions and the process for how and when the various roles would download the statements. This will prevent any headaches down the road when the timing is tight to review and open statement access to HR, managers, and/or employees in Production.
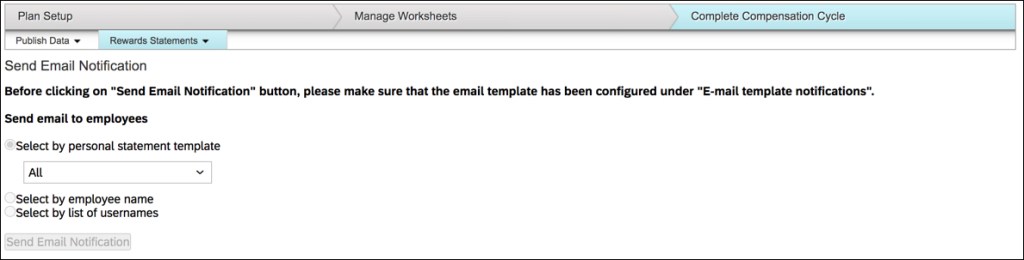
9. Make use of standard Email Notifications
If the employees will be able to access their own statements, there is a standard email notification that can be sent. The email text can be setup in E-Mail Notification Template Settings. This will allow for Compensation Administrators to send specific text to employees or groups of employees letting them know that their statements are available and how to navigate in the system to find them.
10. Finalize with a smooth move to Production
Validate any final changes with the customer. Company numbers and final performance may come in just prior to statement generation so an additional validation of the text sections especially is suggested.
You can recreate the statements in each environment, but I suggest to make all changes in the lowest environment and then download and upload them instead. This takes away some flexibility in making last minute changes in Production but keeps the environments consistent and encourages testing to be done in the lower environments before moving to Production.

Leave a comment